• Pho-Art Blog
  • Artists Sketch Club
  • Work
  • About
  • Contact
Menu

judy m boyle

  • Pho-Art Blog
  • Artists Sketch Club
  • Work
  • About
  • Contact

Pinhole Photography

June 15, 2017
IMG_0422.jpeg
boats_tree.jpg
IMG_0424.jpeg
bollman_truss_1_ondu.jpg
IMG_0425.jpeg
dock.jpg
IMG_0426.jpeg
patuxent_river_ondu.jpg
rental_boats.jpg
savage_double_exposure.jpg
savage_mill_ruins_2.jpg
savage_mill_ruins.jpg
tree_boats_blurred.jpg
tree_boats_steps.jpg
tree_steps.jpg

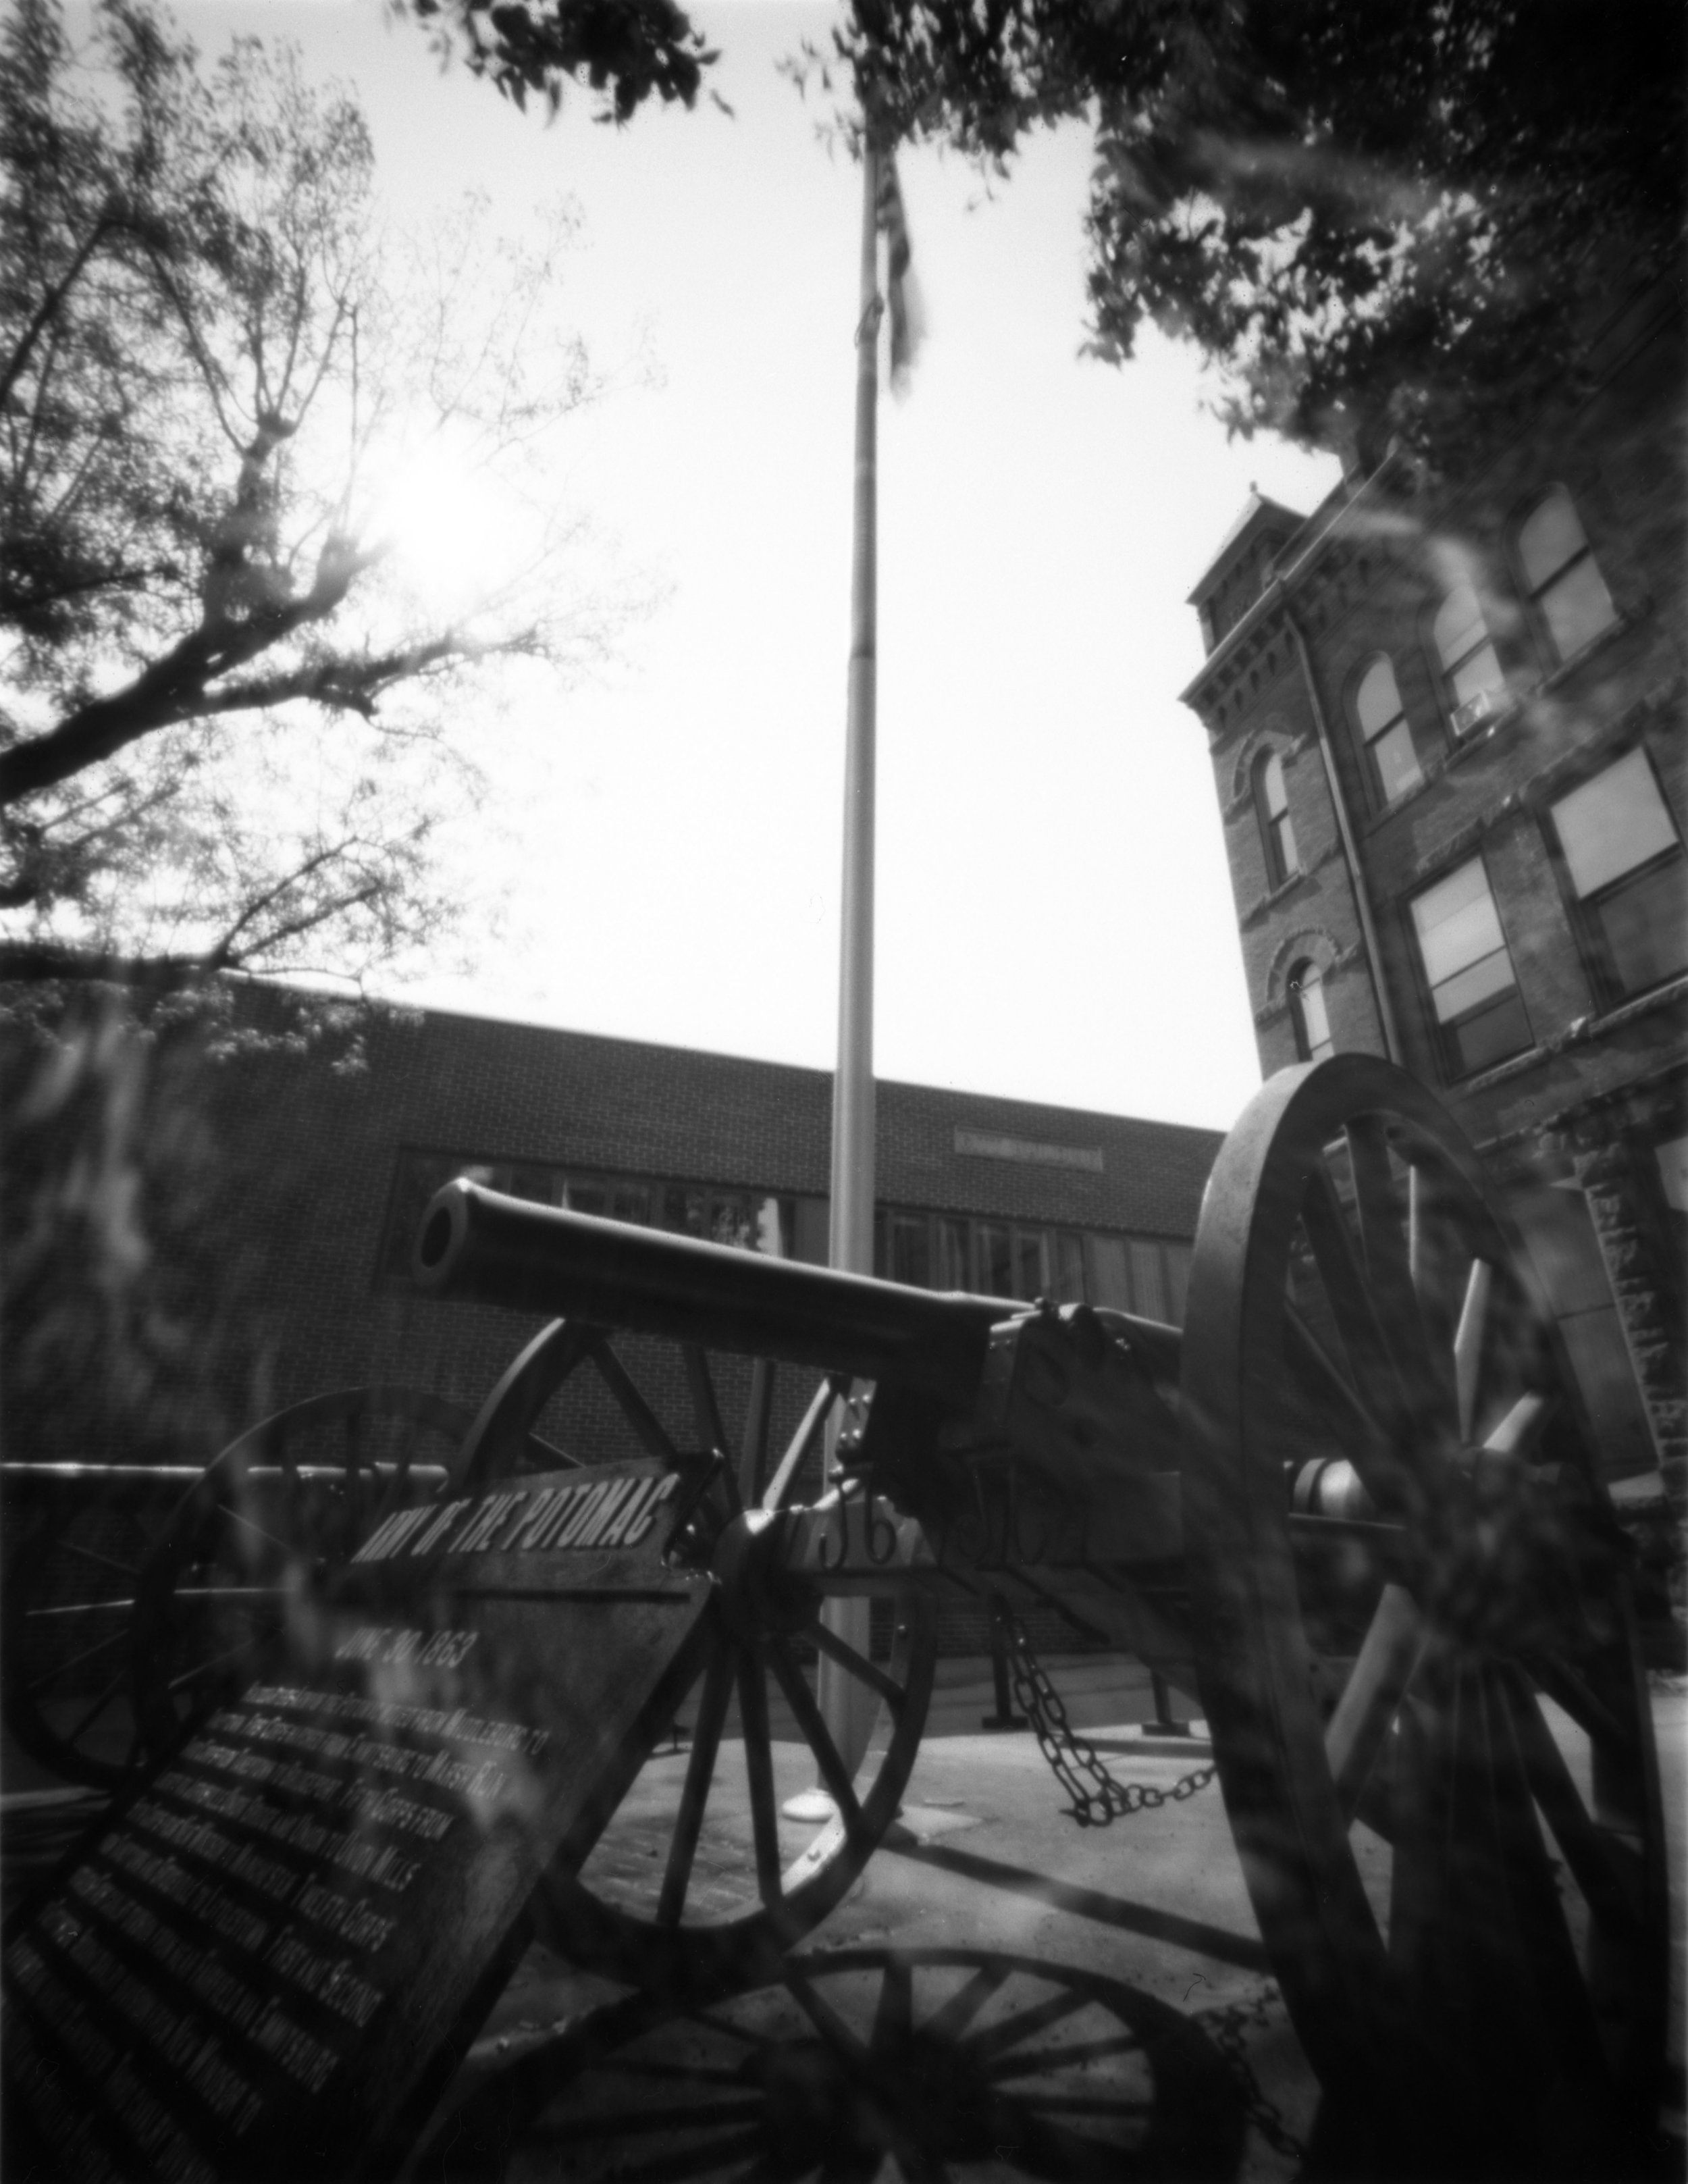
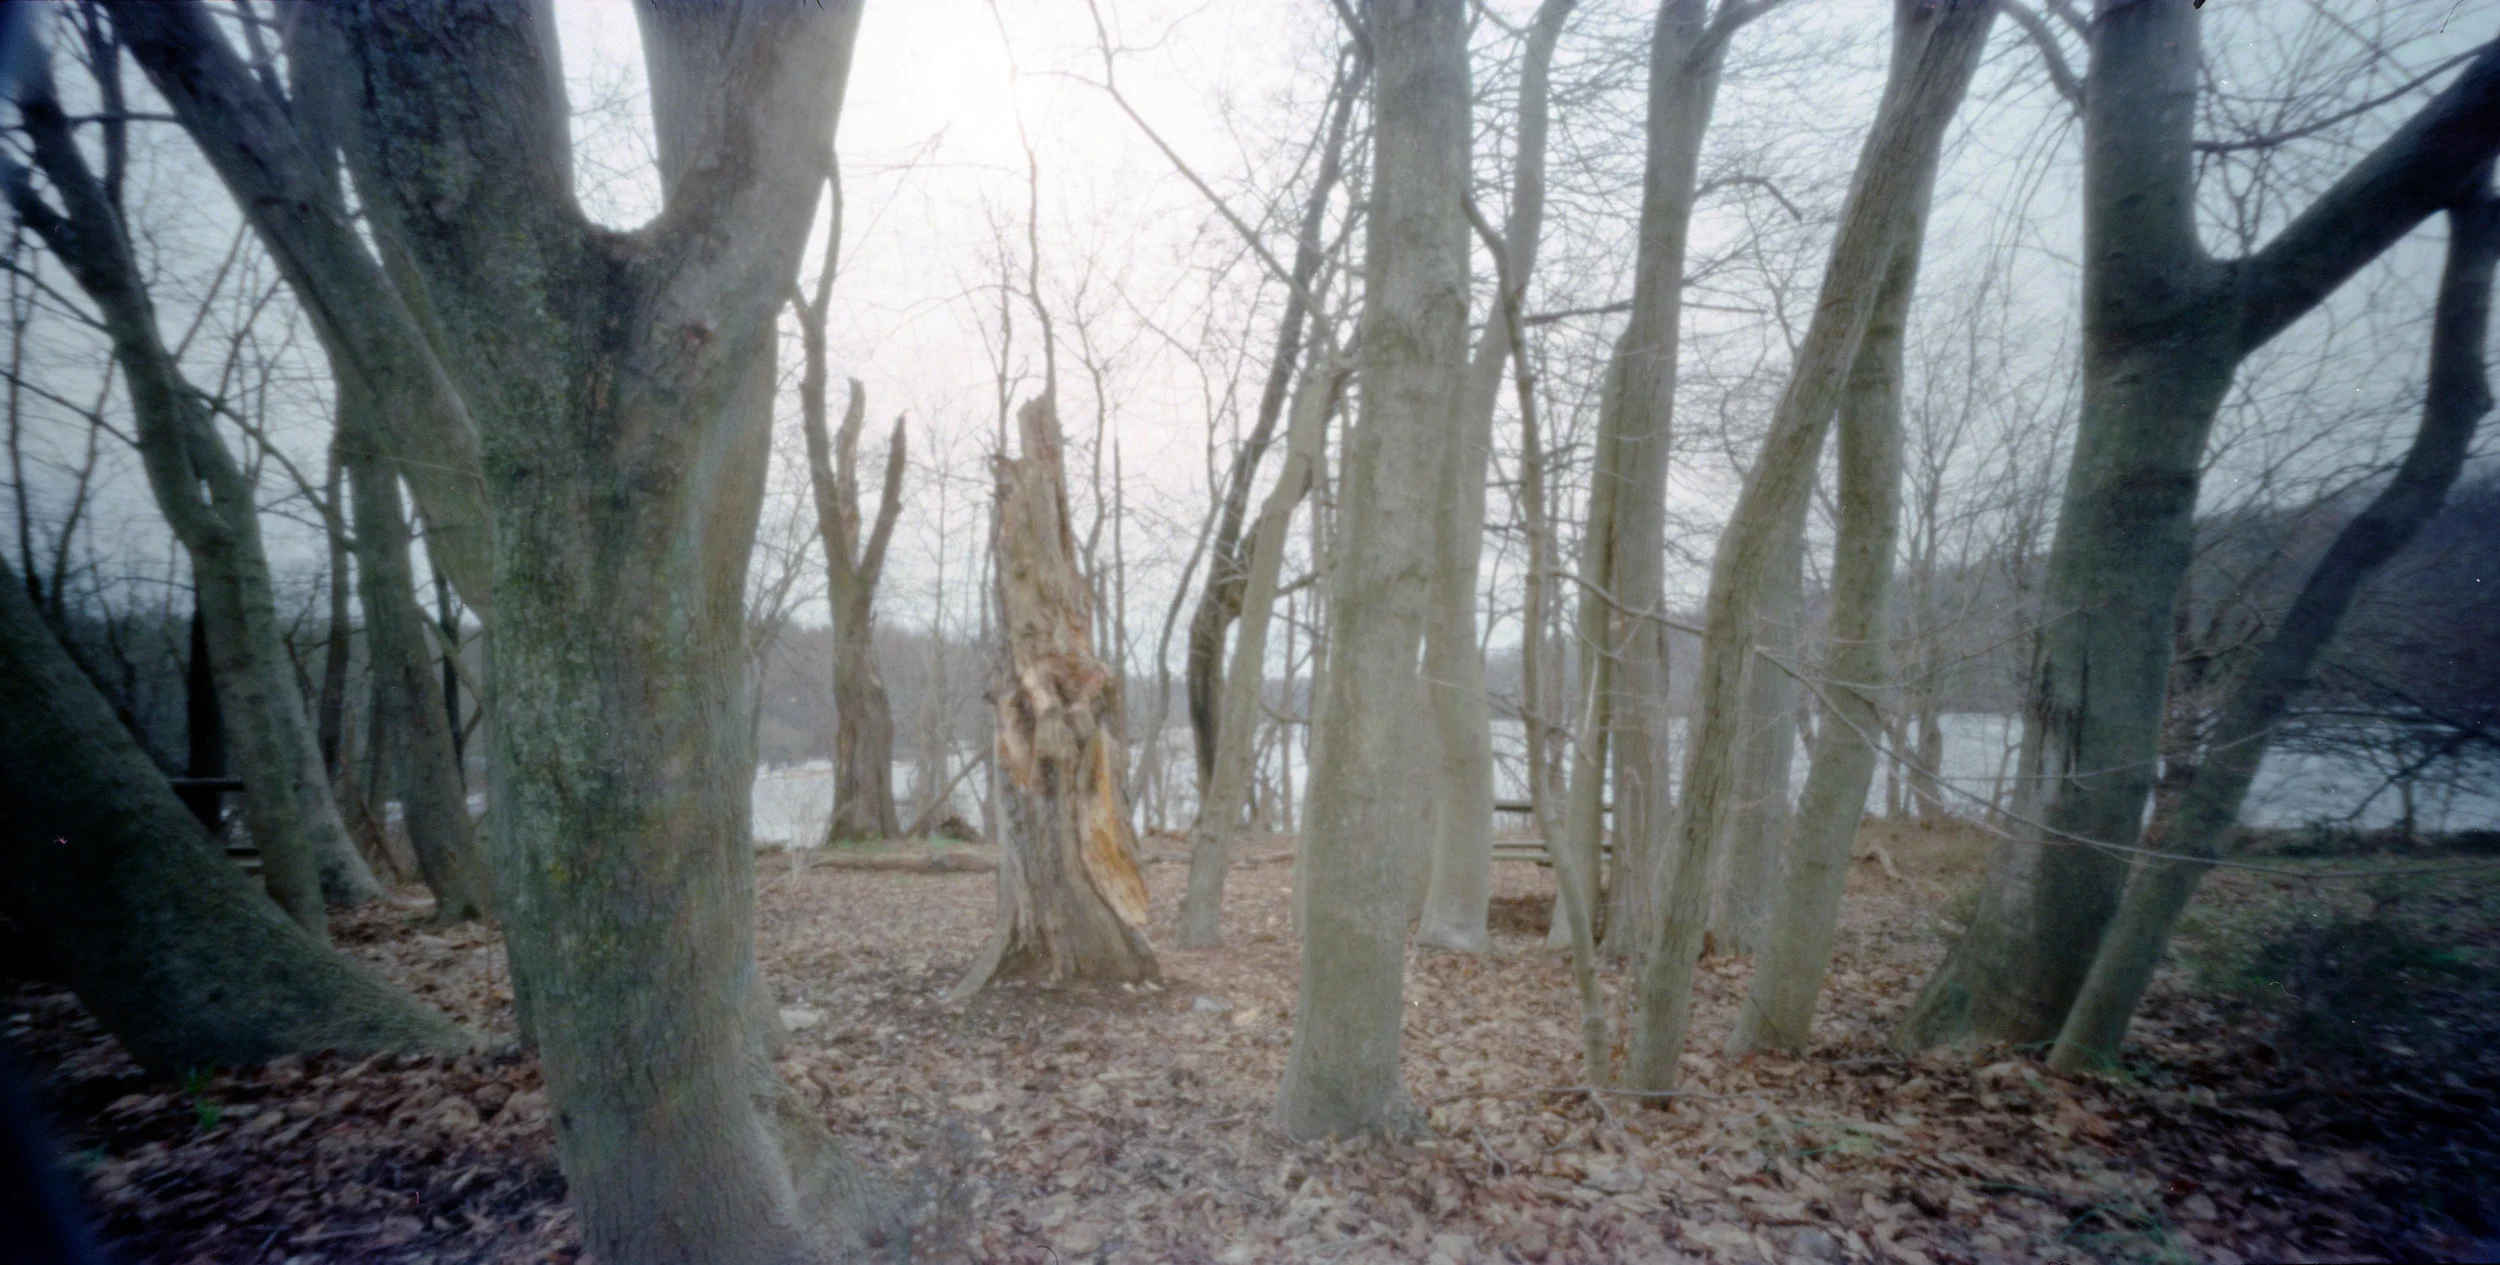
Week 22 - Revisiting pinhole photography and film developing at home. Last weekend I picked up my Holga Wide Pinhole Camera, which still had a half used roll of film in it and drove out to Devil's Den in Gettysburg to finish the roll. I wanted to try a new photo composition tip that I heard about on a podcast to get better pinhole photos. 

I tried positioning my camera so that there would be close objects and objects further in the distance to create a more exaggerated pinhole effect in the photos. I couldn't remember what kind of film I had put in the camera, I had forgotten to write it on the back on a piece of tape. When I got home I developed it in caffenol (a mixture of instant coffee, super washing soda, and vitamin C powder) and saw that there were photos on the negatives when I pulled them out of the tank. I determined that it was Ilford FP4 from the brick of expired film that I had bought off of ebay last year. Some of the photos came out well considering the age of the film, but there were areas on some of the negatives where the backing paper numbers had burned into the image.

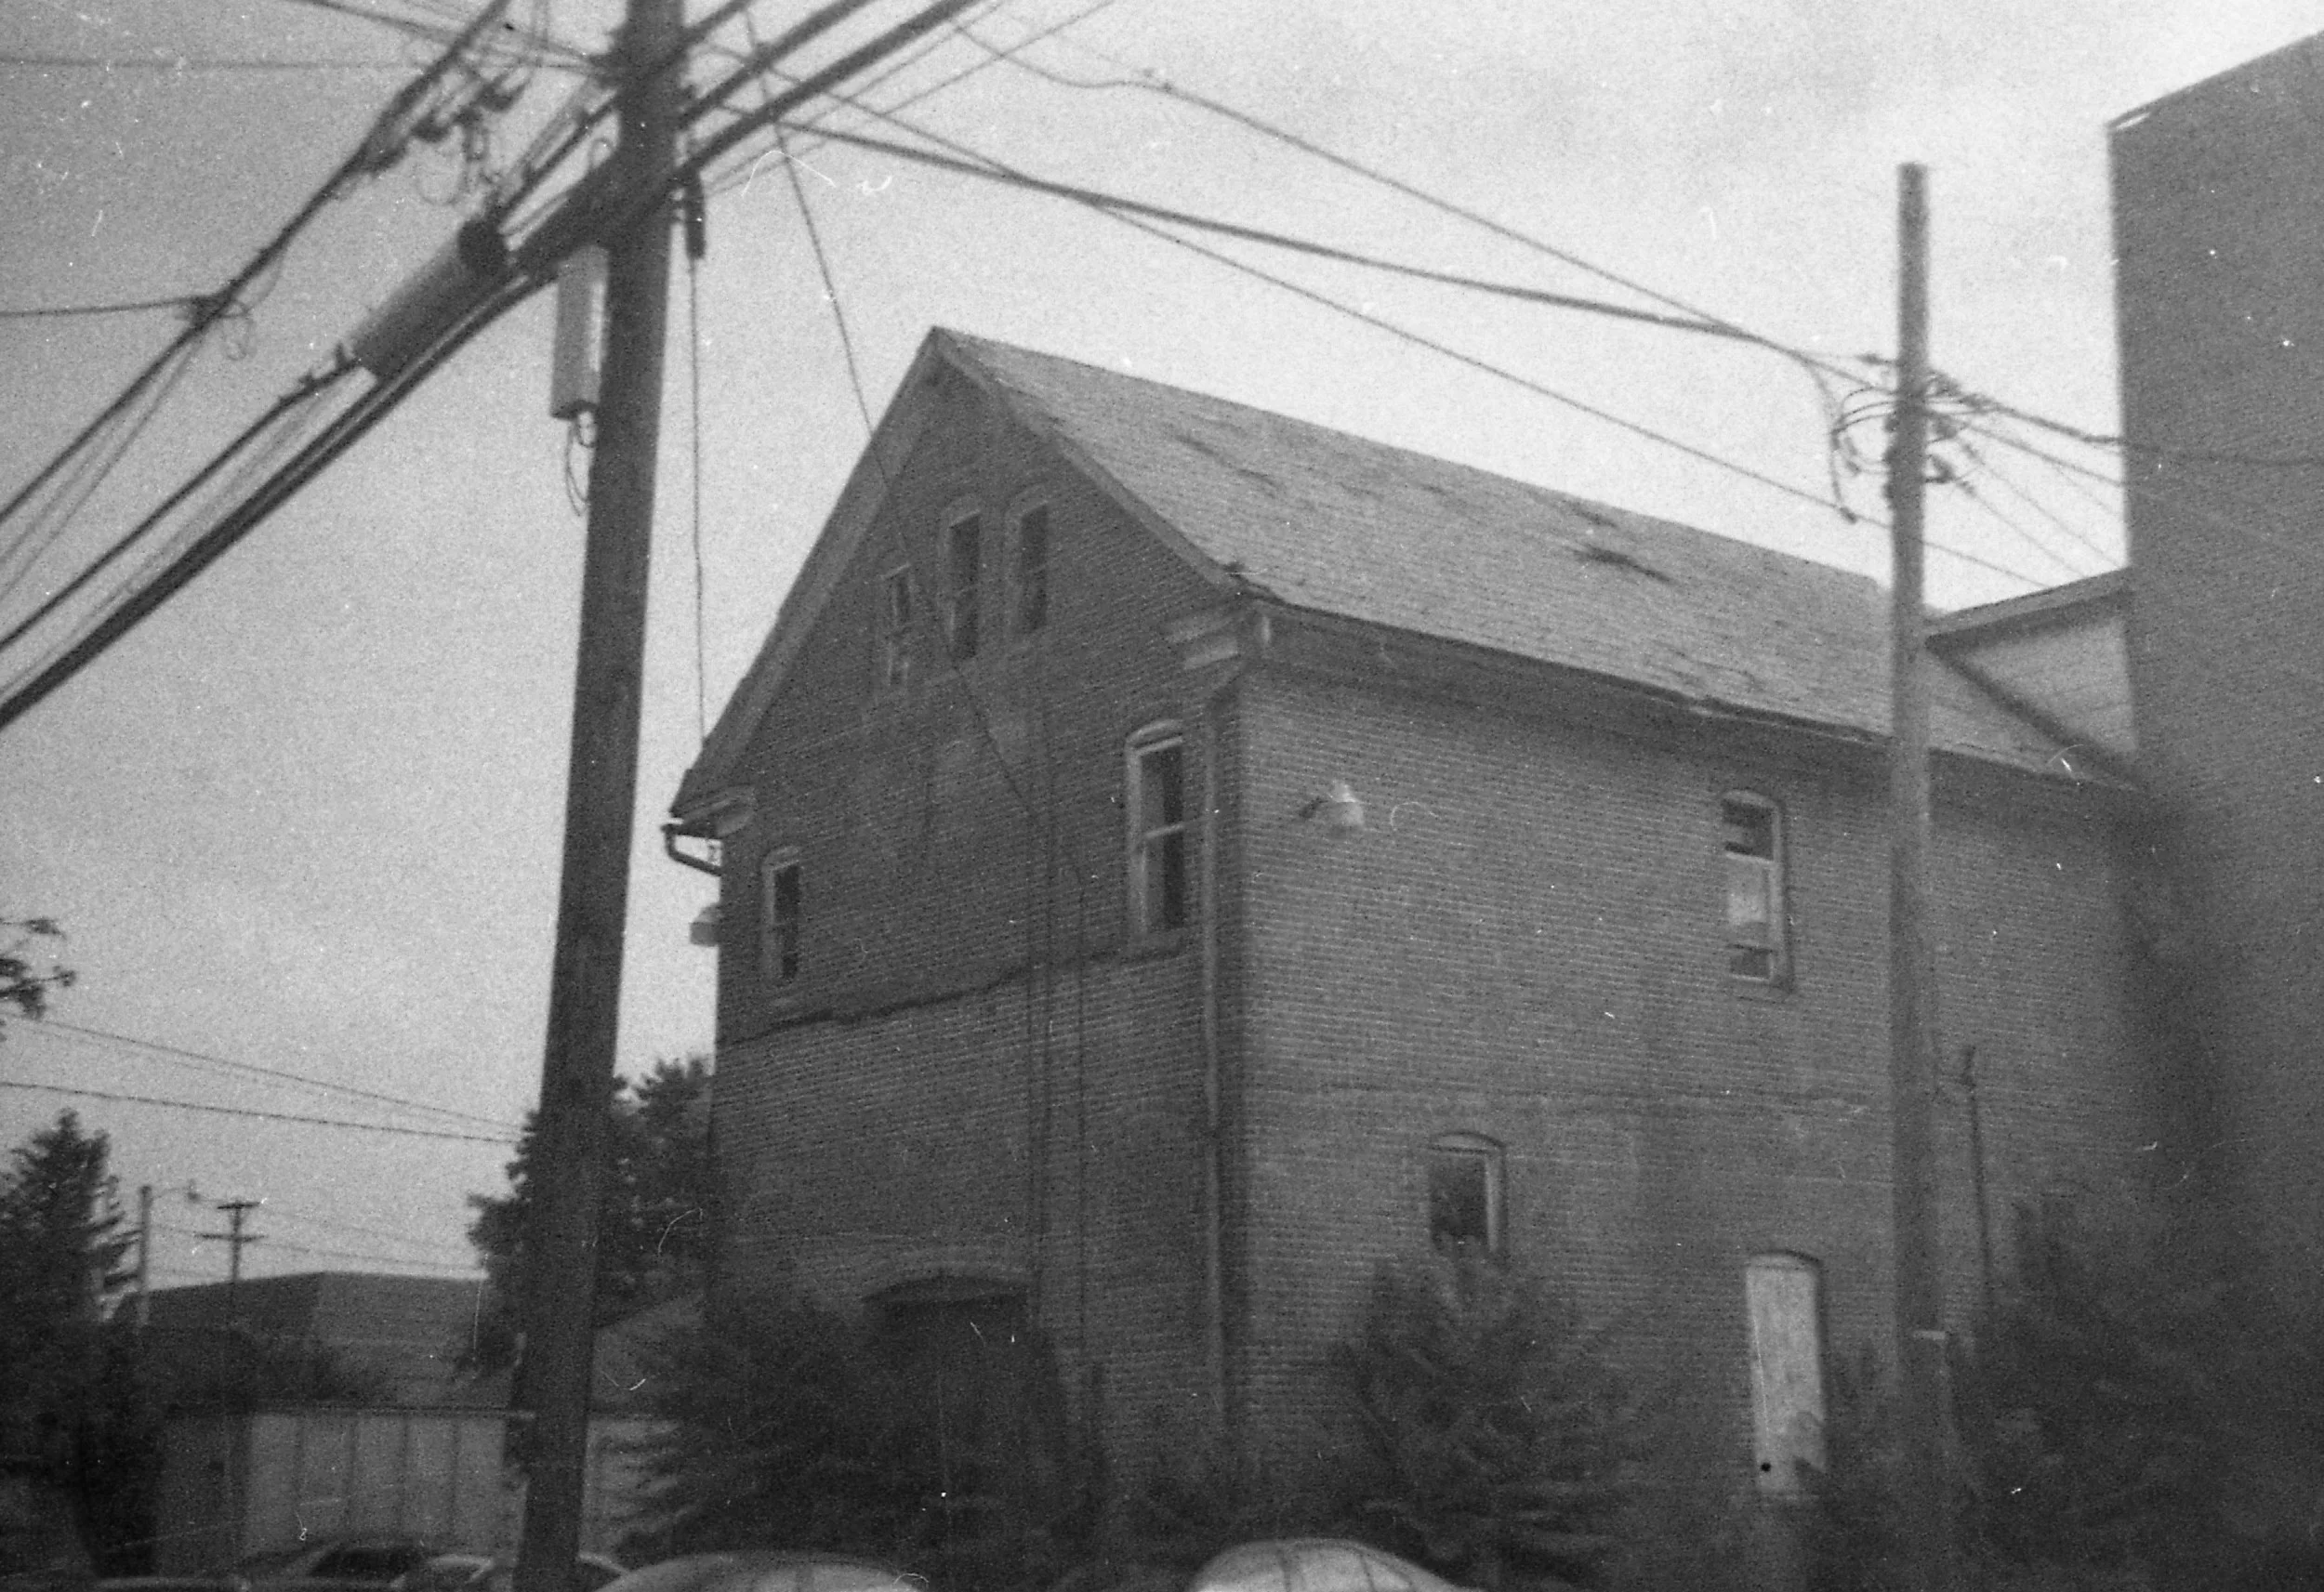
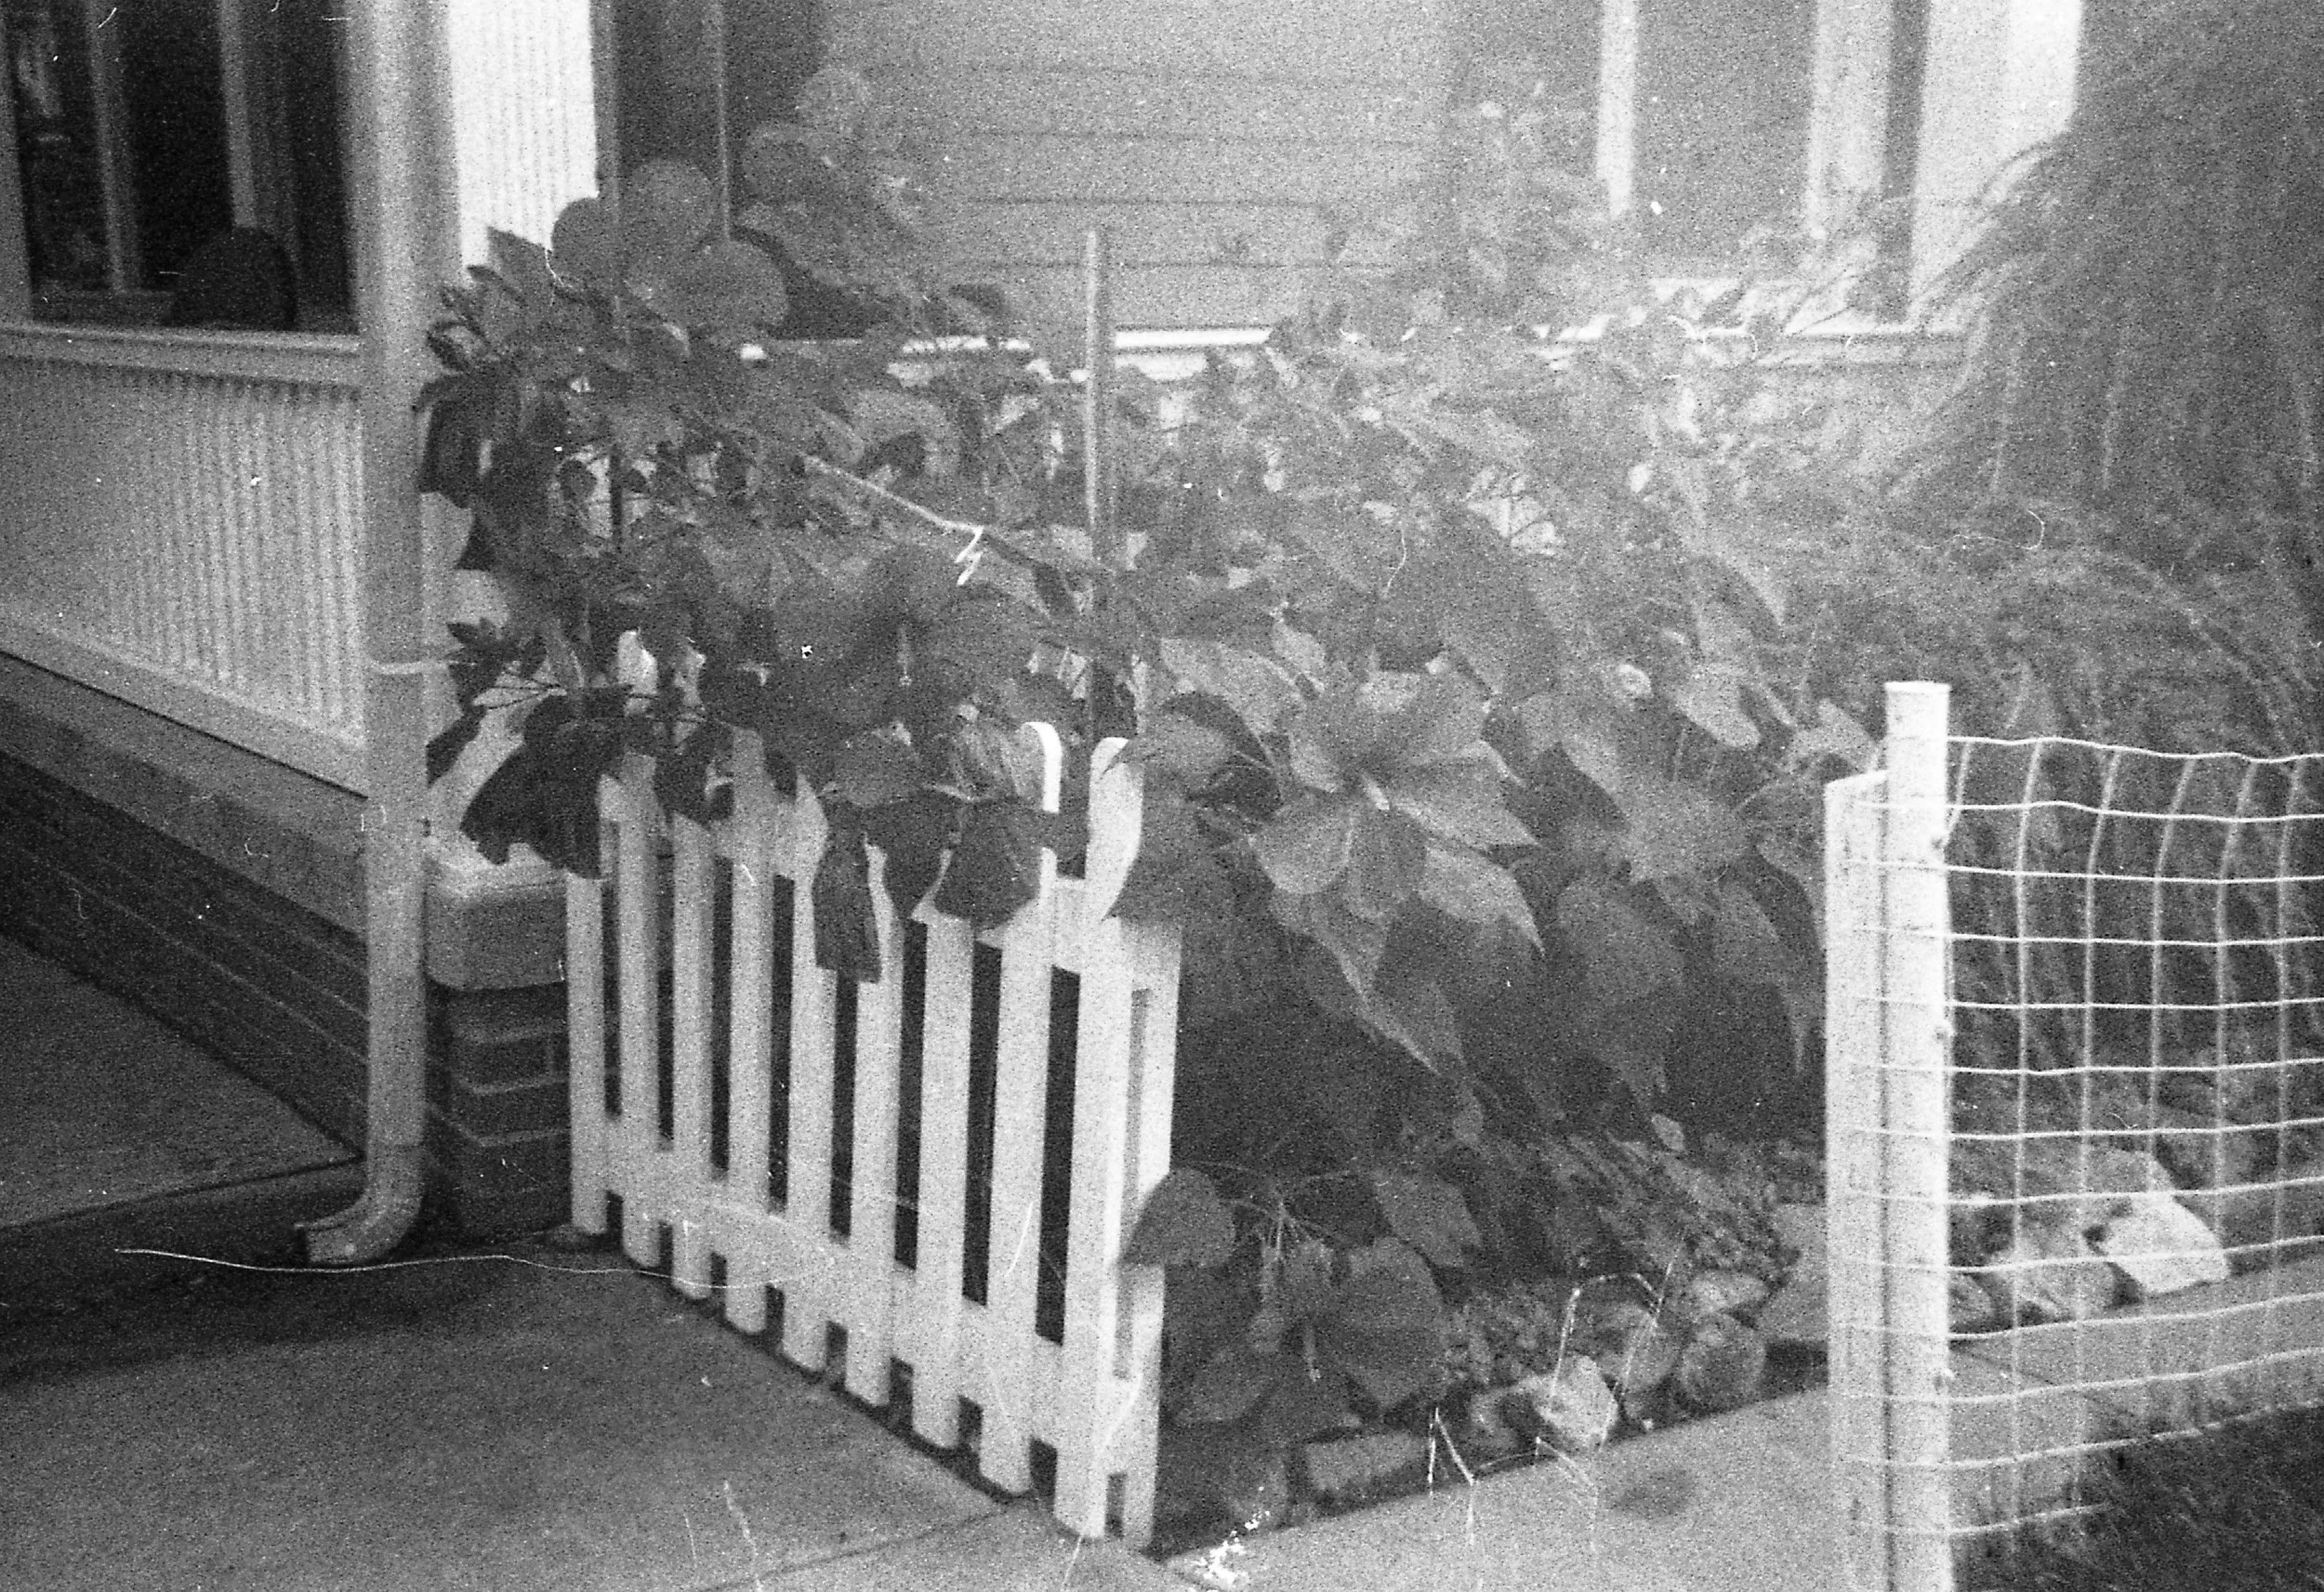
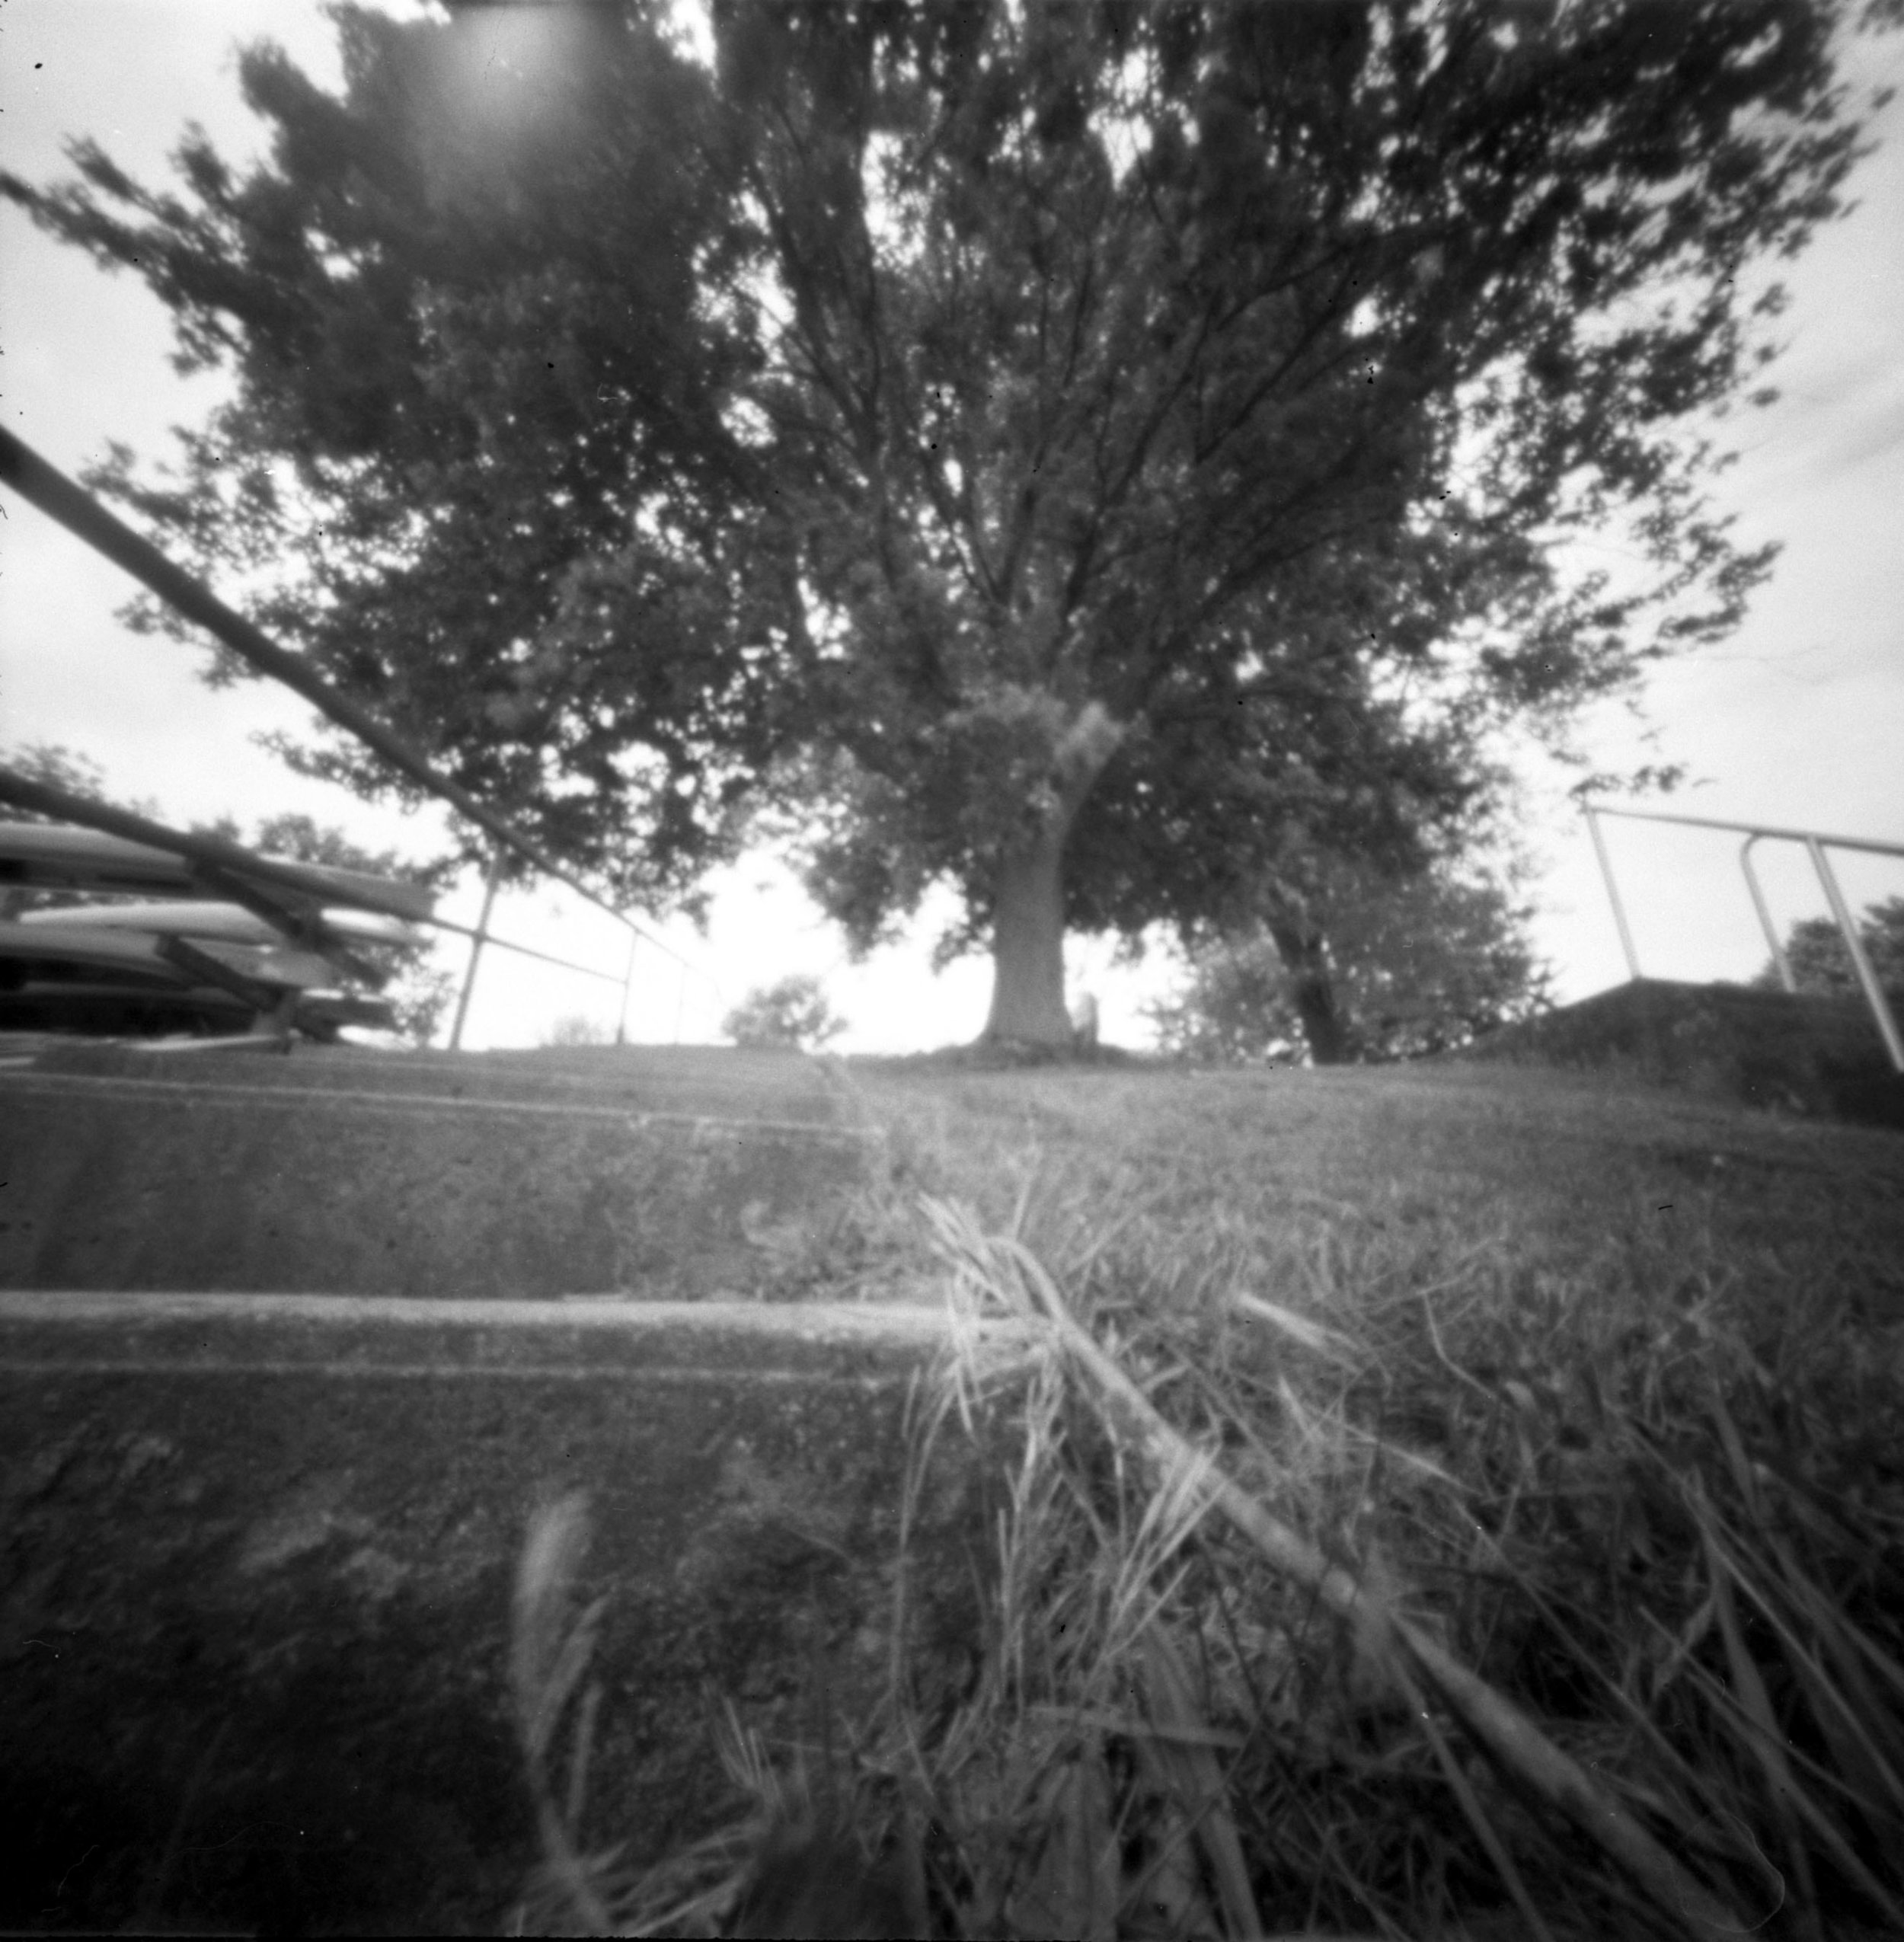
This past weekend I got out my Ondu MKII 6x6 Pinhole camera that I recieved as a Kickstarter reward last year which still had a half a roll of extremely expired Kodak Verichrome Pan film left inside from a couple of months ago. I drove out to Codorus State Park looking for a subject and wound up at the rental marina. I set about trying to make photos that had the type of pinhole composition I was trying to achieve, without worrying too much about the subject matter. I finished up and headed home to develop the roll in Kodak D-76 to find that the resulting photos were closer to the type of pinhole photos that I wanted to create.

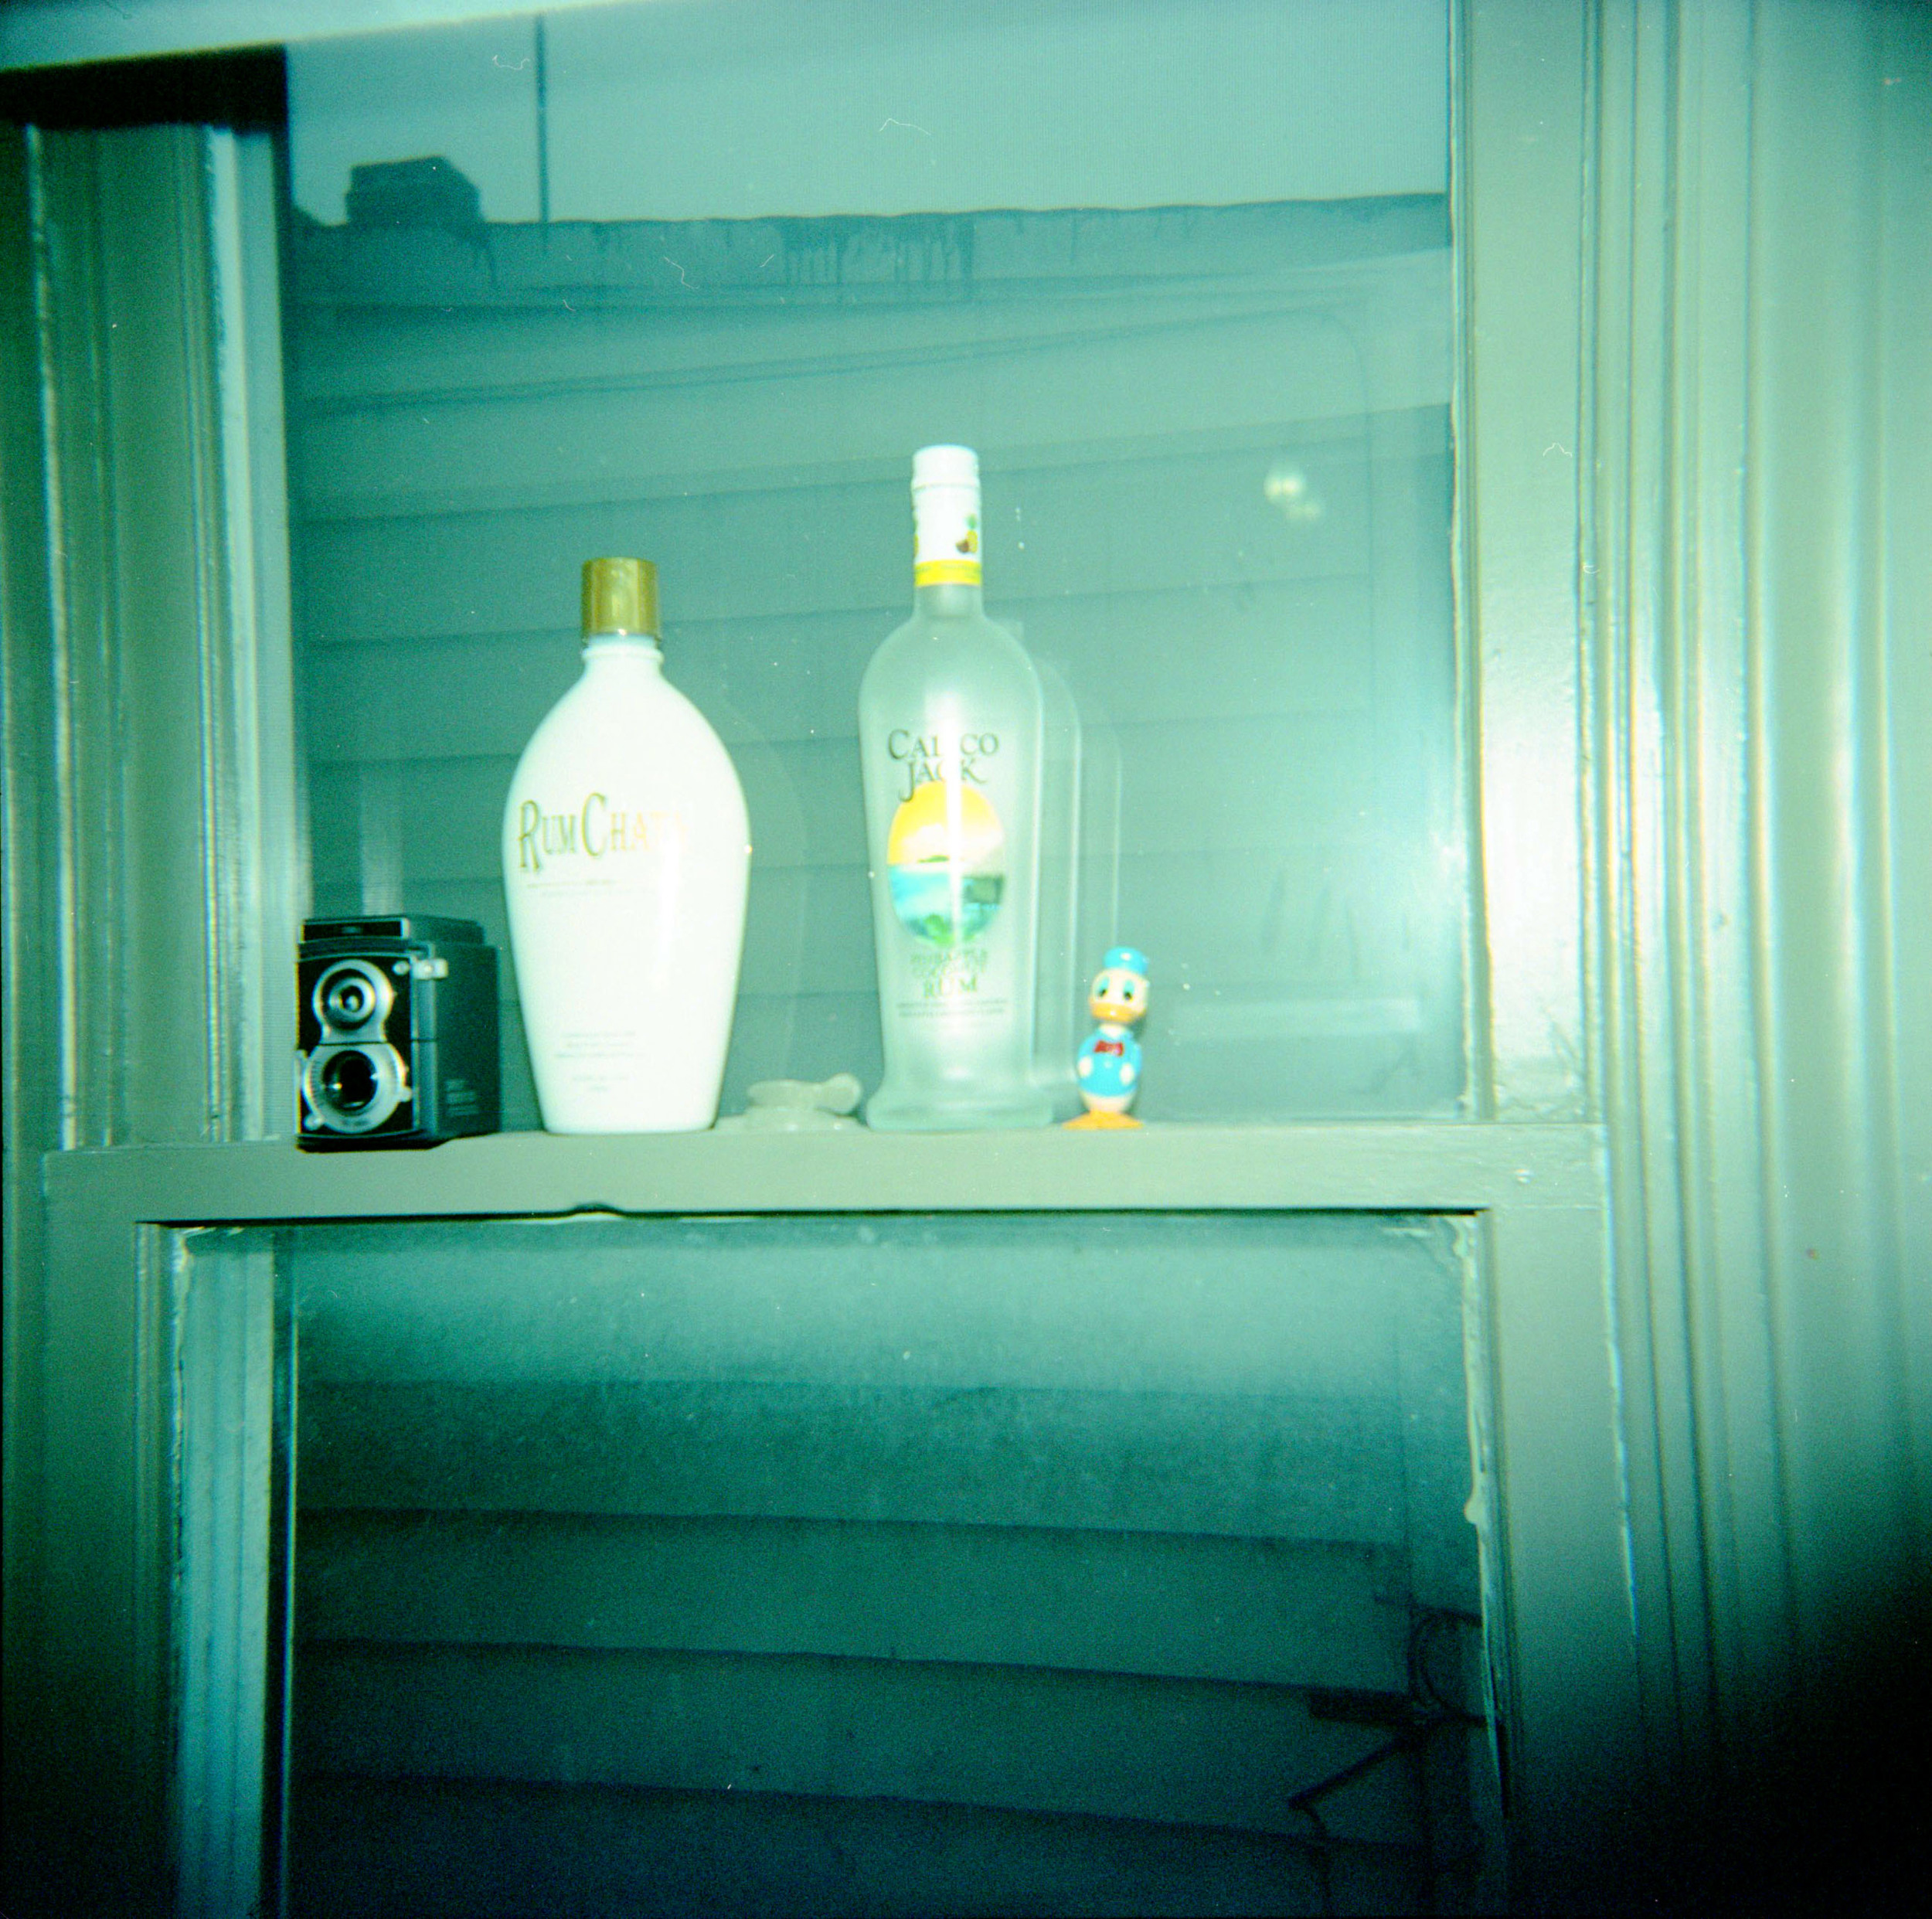
In the next couple of weeks I want to try creating pinhole photos in my studio with some of the things in my collections, with and without flash. I plan to revisit pinhole photography on my Diana F+ camera with the instax back from Lomography to see if I can get the same kind of effect I got with the Ondu MKII. A pinhole photography exploration might be my next photography project after finishing 26 instax packs.

Meanwhile, I will be getting back into my studio and continuing my Create-A-Thon year long creative exploration soon, it's just been too nice outside to be cooped up in my studio!

In 2017 Create-A-Thon, Film Photography Tags pinhole photo, pinhole, pinhole photography, ondu MKII 6x6, Diana F+, Diana F+ Instax Back, Diana, holga wpc 120, holga wpc, holga wide pinhole, caffenol c, caffenol, kodak verichrome pan, ilford fp4, Kodak D-76, home developing, home processing
Comment

Lensless Pinhole 4x5 Camera - 52 Cameras, 52 Weeks

September 12, 2016
cannon_2x.jpg
st_matthews_front.jpg
cannon_2x_sunglare.jpg
cannon_rear.jpg
st_matthew_corner.jpg
cannon.jpg
st_matthews.jpg
st_matthews_streetview.jpg
cannon_2x.jpg st_matthews_front.jpg cannon_2x_sunglare.jpg cannon_rear.jpg st_matthew_corner.jpg cannon.jpg st_matthews.jpg st_matthews_streetview.jpg

Week 36 - Lensless Camera Manufacturing Co. 4x5 Pinhole Camera, received at Christmas 2014 from my wife, Brenda. I have been weighing whether or not I wanted to delve into large format film photography for some time, I thought a 4x5 pinhole camera would be a good jumping off point. Some of the obstacles for me for large format film were the cost, reliable processing, and the ability to scan the negatives myself. I've pretty much been keeping to small and medium format cameras, because I could pick them up at flea markets, craigslist, and yard sales for a few dollars. I don't have a lot of extra money to spend on my hobby, and I really just enjoy the process of shooting photos and developing them myself. 

When I first started using the 4x5 pinhole camera, I found a technique referred to as the "taco method" using a Paterson two reel film tank for developing 4 sheets of film. I successfully used this method for over 70 photos but when I saw the kickstarter for Timothy Gilbert's SP-445 developing tank, I thought this would be a great option for processing my 4x5's. My tank arrived a few weeks ago and I was eager to give it go. On labor day, I loaded up 4 of my film holders with Arista EDU 100 and took a quick trip to downtown Hanover to shoot photos of St. Matthews Church on Chestnut Street and then to the square to shoot photos of the cannon display there.

I have to confess, I'm a bit afraid of the dark and only use a changing bag to load my film in holders and developing tanks. I found that loading the SP-445 from the film holders in the changing bag was a bit cumbersome, but with more practice it will go more smoothly. I think that I might invest in a larger film changing tent, especially if I wind up shooting more 4x5 film. The tank only uses 16 oz of developer for 4 sheets of 4x5 film, which is awesome! I followed the tips from the kickstarter project videos for processing and the only issue, which is very minor, is that there was a small amount of leakage around the caps. It wasn't enough to be a problem, but perhaps the next time I use it, I will follow the tip of wetting the O-ring around the lid before closing it up.

The negatives came out well, I used a 1+1 solution of Kodak D-76 for 9 minutes. I previously had scanned my 4x5's in two passes on my Epson V500 Photo, then stitched them together in Photoshop. About six months ago, I bought an old Epson Perfection 2450 Photo flatbed scanner and hooked it up to an old iMac, creating a dedicated 4x5 film scanning station. The scanner cost $12 plus shipping from ebay and I bought the dead iMac from Craigslist for $35. I was able to fix the iMac and load an old version of Photoshop on it to use the scanner.

In 52 Cameras 2016 Project, Film Photography, Pinhhole Photography Tags 4x5 film, Arista Edu 100, Large Format Film, SP-445, Kickstarter, home processing, home developing, epson v500 photo, Epson Perfection 2450 Photo, iMac, Kodak D-76
Comment

Generic Plastic Camera - 52 Cameras, 52 Weeks

August 5, 2016
alley_boat.jpg alley_building.jpg georges_b_street_subs.jpg henry_motor_cars.jpg scooter.jpg baltimore_street.jpg dome.jpg roofline.jpg warehime_myers_lion.jpg flowers_on_fence.jpg pinwheel.jpg steam.jpg domed_building.jpg fire_hydrant.jpg calvert_street.jpg explosives_truck.jpg boats1.jpg scratched_frame.jpg scratches_and_blurs.jpg light_blurs.jpg under_the_bridge.jpg mary_ann_furnace_stream.jpg geese.jpg boats.jpg boat_with_teeth.jpg

Week 31 - Generic plastic camera purchased at Morningstar Flea Market Antique Mall for $10. The tag said "Argus 35mm Camera" on it and came in a bright yellow box with the words "Say Cheese" and "Storer Cable", whatever that means. It also came with a cheaply made pleather carrying case. I did an internet search but could come up with nothing on a plastic Argus 35mm camera, or anything using the other words on the box. I thought at best, it could be a generic Holga or Diana type of camera. It felt quite heavy, probably had a weight in the bottom of the camera.

On the front, the lens reads "Optical Color Lens, Auto Fix Focus 50mm Lens 1:6." It has a tripod socket on the bottom and a rewind release button. I used a roll of FPP EDU 400 Black and White film from the Film Photography Project, as my color chemicals were recently expired. Photos were shot on a morning walk around Hanover, PA and also around Baltimore, MD on my lunch break. I found that the lens was much wider than the viewfinder indicated, I could have gotten closer on some of my shots.

It was very humid on the day I was trying to wind the film onto a developing reel in the changing bag, which resulted in a first failed attempt where in frustration, I shoved the film into the tank to protect it from light. I cooled off a bit and went back in while in a cool air-conditioned room. As a result the film got a little banged up with a few scratches and creases. I don't think it detracts much from the low quality of the photos that I got from this camera, I was hoping for photos with a dreamy quality and a little vignetting. The film was developed in Caffenol and scanned on Epson V500 Photo.

In 52 Cameras 2016 Project, Film Photography Tags Generic Plastic Camera, 35mm Camera, 35mm Film, Hanover PA, baltimore maryland, Caffenol, Storer Cable, Say Cheese, Holga, Diana, FPP EDU 400, home processing, home developing, Epson V500 photo, 52 cameras 2016 project, 52 cameras
Comment

Pentax Auto 110 - 52 Cameras, 52 Weeks

August 2, 2016
View fullsize middletown_cemetery_angel.jpg
View fullsize tree_with_finger.jpg
View fullsize bankamericard.jpg
View fullsize middletown_cemetery_small_angel.jpg
View fullsize bridgestone.jpg
View fullsize convenience.jpg
View fullsize dutch_country.jpg
View fullsize overgrown_graves.jpg
View fullsize gunpowder.jpg
View fullsize gunpowder_baptist_church.jpg
View fullsize john_deere.jpg
View fullsize lake_marburg.jpg
View fullsize prettyboy_bridge.jpg
View fullsize prettyboy_dam_bridge.jpg
View fullsize prettyboy_reservoir.jpg
View fullsize sad_women.jpg
View fullsize silos.jpg
View fullsize tomato_sign.jpg
View fullsize tractor_for_sale.jpg
View fullsize tractor_seat.jpg
View fullsize wagon.jpg
View fullsize warreners.jpg

Week 30 camera - Pentax Auto 110 purchased from Ebay. I originally purchased a body, 3 lenses and a flash, but the body and flash were not functional much to my disappointment. I thought I could still use the lenses on my mirrorless Pentax Q10 camera, but a couple of weeks later, I was able to pick up a working body for $9.00 with free shipping from ebay. I've been wanting to pick up this particular little 110 SLR camera since I first heard about it a few years ago, but the prices were more than I wanted to spend. I have a soft spot for Pentax cameras, as my very first SLR was a Pentax K1000 that I bought for my photography class in college over thirty years ago.

This camera is so small, and the interchangeable lenses are even smaller, its adorably cute. The three lenses that I have - 18mm, 24mm, and 50mm, easily fit in a pocket with the camera body. I mostly used the 24mm, which is the standard lens, while the 18mm is wide angle and the 50mm  closeup. The Auto 110 has an automatic shutter, but you still have to manually focus the f2.8 lenses (the only aperture). The first roll I put in was expired Kodak Gold, but unfortunately it was ruined by my expired C-41 chemicals while developing. I was greatly disappointed but luckily I had just gotten my order of Lomography Orca 110 BW film.

I packed a new fishing vest I just bought to use as a photographer's vest and headed out in my car. (it was unbearably hot and humid) I think the vest will be quite useful when I have just a couple of cameras and don't want to carry a bag - it held 3 small cameras, lenses, pocket watercolors, small sketchbook, snack, and water. Photos were shot around Baltimore County, Maryland and the Mary Ann Furnace Trail observation deck by Lake Marburg.

Processing was with Kodak D-76, 1+1 for 7 minutes using the new Yankee Clipper II tank that I just purchased (it was the only currently available tank system that I knew of that had a 110 film reel). Negatives were scanned using a 110 film adapter purchased from Negative Solutions on ebay that was made for Epson V500 Photo scanners.

In 52 Cameras 2016 Project, Film Photography Tags Pentax Auto 110, Pentax K1000, Orca 110 BW, Lomography, Yankee Clipper II, home processing, home developing, 110 film, 52 cameras, 52 cameras 2016 project
Comment

Retro Slide Show!

July 25, 2016
28095569965_358040b35f_o.jpg
28095568045_340773ee99_o.jpg
28095564165_5a791372eb_o.jpg
27992573952_5b82d83236_o.jpg
28095561075_89c1b92f92_o.jpg
27992573182_2ab9e5225f_o.jpg
28060856756_03d415b031_o.jpg
28060855986_a55369b541_o.jpg
28060860146_79c67f5e7e_o.jpg
28095569965_358040b35f_o.jpg 28095568045_340773ee99_o.jpg 28095564165_5a791372eb_o.jpg 27992573952_5b82d83236_o.jpg 28095561075_89c1b92f92_o.jpg 27992573182_2ab9e5225f_o.jpg 28060856756_03d415b031_o.jpg 28060855986_a55369b541_o.jpg 28060860146_79c67f5e7e_o.jpg

Back in March of this year, I purchased an E6 (slide film) home developing kit from the Film Photography Project so that I could try making my own slides from the box of RetroChrome film in my fridge. I'll be honest here, I started developing my own film a while ago because it is much less expensive than mail order. I gradually dipped my toe in home developing when I read about caffenol developing several years ago and have progressed to other types of developing. I previously had a reliable develop-only option available at the local CVS, but they stopped in-store processing last year. The other local option is Walmart, which no longer returns your negatives, which I would scan on my Epson V500 Photo.

After having success with caffenol, Kodak D-76, and a couple of Unicolor C-41 kits, I wanted to try E6 processing at home - the cost of 1 mail order roll of slide film processing is almost as much as the kit costs, but I would be able to develop more rolls myself with the kit. I was really excited when I pulled the first rolls of slide film out of the tank to see beautiful positive images and couldn't wait to get them into slide mounts and project them. I scoured Craigslist for an inexpensive slide projector, finding a Vivitar 3000AF model with two extra trays and an extra bulb for $25. The drive to get the projector was over an hour away, but with the assurance of the owner that it was fully functional, Brenda I drove to Marysville, PA for the purchase. I was a bit annoyed that the owner wouldn't stop talking about the projector, when I had already told her that I wanted to buy it. Just take my money already and let us be on our way!

Now that we had the projector and fresh slides, I invited a friend of mine up for a home slide show and asked her to bring along some slides of her artwork that she had made years ago. Everything was great with the projector and the slides, but our makeshift screen from a large piece of foam board left a little to be desired. So, that evening, I was back on Craigslist looking for a portable projection screen and found one for $20. We picked it up along our Sunday drive around Lancaster County the next day.

The last thing I needed was more slide mounts - I bought a box of 500 Hama DSR one piece plastic mounts, which are very easy to use. I will be able to mount about 20 rolls of film with those, and I plan to be on the lookout for old slides at yard sales and flea markets for future home slide shows.

In Film Photography Tags Retrochrome 320, Slide Projector, Slide Film, E6 developing, Unicolor, home processing, home developing, film developing, Film Photography Project, slide, Vivitar 3000AF
Comment

Worldwide Pinhole Photography Day 2016

May 5, 2016
wppd_2016_our_house.jpg
wppd_2016_front_porch.jpg
wppd_2016_streetview.jpg
wppd_2016_dogwood_blooms_2.jpg
wppd_2016_tulips.jpg
wppd_2016_our_house.jpg wppd_2016_front_porch.jpg wppd_2016_streetview.jpg wppd_2016_dogwood_blooms_2.jpg wppd_2016_tulips.jpg

I had been looking forward to this year's Worldwide Pinhole Photography Day on April 24 for several months and had made plans with a friend to go to Patapsco State Park in Maryland. But as the day approached, I came down with a cold and was not feeling up to a daylong excursion carrying my pinhole gear.  So, I made the best of it, and made it out to the front yard to photograph our blooming Dogwood tree. The featured blog photo here is my entry in the WPPD online gallery this year.

Camera - Holga WPC Wide Pinhole Camera. Film - expired Kodak Portra 160NC. Developed with Unicolor C-41 home kit. Scanned with Epson V500 Photo.

In Film Photography, Pinhhole Photography Tags WPPD, Worldwide Pinhole Photography Day, WPPD 2016, pinhole, pinhole photo, holga wide pinhole, holga wpc 120, holga, holga wpc, kodak portra 160nc, expired film, unicolor c-41, home developing, film developing, Film Photography Project
Comment

Kodak Brownie Bullet Camera - 52 Cameras, 52 Weeks

March 17, 2016
street_perspective.jpg
dog_victrola.jpg
washington_monument.jpg
cherry_blossoms.jpg
old_building.jpg
architecture.jpg
cityscape.jpg
st_paul_intersection.jpg
street_perspective.jpg dog_victrola.jpg washington_monument.jpg cherry_blossoms.jpg old_building.jpg architecture.jpg cityscape.jpg st_paul_intersection.jpg

For week 11 of my 2016 - 52 Cameras, 52 Weeks project, I dusted off the Kodak Brownie Bullet 127 film camera that's been in my collection for a while. I don't recall where I got this camera, but I believe it was acquired during the time that I was going to focus my collection on Kodak Brownie cameras (not likely now as I've gone in too many directions with my collection). The Brownie Bullet is almost identical to the Brownie Holiday Flash, made between 1953-1962, and was used as premium giveaway during the late 1950's to mid 1960's. It is a bakelite camera designed by Arthur H. Crapsey that produces 8 photographs on a roll of 127 film.

I loaded the camera with the only currently available film, Rera Pan 100 that I purchased from Freestyle Photographic Supply. The weather this week has been warm and sunny, so it was a perfect opportunity to get out at lunch break and take a walk around Baltimore with the Brownie Bullet in my camera bag. In my experience, Rera Pan 100 works best in bright sunny conditions. I usually process it with Kodak D-76, but not having any mixed up, I tried it with my usual Caffenol concoction.  I don't fuss too much with the developing temp, only using water that I've stored at room temperature, and using the same steps that I found on the Photojojo website a couple of years ago. I mix up the super washing soda, instant coffee and vitamin C in the same combination every time, develop for 8 minutes, use water for stop, fix for 5 minutes and rinse, with a final wash of generic Photoflo. I haven't experimented too much as I've been pretty happy with how the Caffenol has been working so far. I scanned the negatives using a 3D printed 127 film adapter that I bought from ebay on my Epson V500 Photo flatbed scanner.

In 52 Cameras 2016 Project, Film Photography Tags rera pan 100, 127 camera, 127 film camera, 127 film, caffenol, caffenol c, home developing, film developing, Kodak Brownie Bullet, kodak, brownie, bullet, baltimore, lunch break, photo walk, photowalk, architecture, baltimore maryland, maryland
Comment

Bonus Camera for 52 Cameras, 52 Weeks - Holga WPC 120

February 11, 2016
ruins_hall.jpg
bridge_over_lake_marburg.jpg
branches_over_stream.jpg
rocks_by_railroad.jpg
trees.jpg
snow_on_rocks.jpg

A bonus camera for my 52 Cameras project this week - with my birthday cash, I ordered a Holga WPC 120 Camera that I had been wanting to get for a couple of years. I thought I should get one soon as I wasn't sure how long they would still be available at a reasonable price. I bought one from Lomography's online store seeing they still had them in stock at a much lower price than other places where it was still available. I thought I would try another roll of the 2002 expired Kodak Portra 160NC in it and brought it along this past Sunday when we went to Codorus State Park and Glen Rock, PA. The camera is capable of shooting 6x9 or 6x12 photos with two interchangeable masks and has an f/135 pinhole, requiring the use of a tripod and a shutter release cable. I have been very impressed with the ultra wide photos that can be achieved with this camera, with some great examples being found on Flickr. After finally shooting with it myself, I can see that I need to try to come up with more interesting angles and subject matter and get in closer. Next time I will use my old standby, Shanghai GP3 100 Pan film developed in caffenol. 

Film developed in Unicolor C-41 Kit purchased from Film Photography Project store and scanned with Epson V500 Photo.

In 52 Cameras 2016 Project, Film Photography, Pinhhole Photography Tags holga wpc 120, holga, holga wide pinhole, pinhole, film photography, Film Photography Project, Glen Rock, codorus state park, lake marburg, kodak portra 160nc, expired film, unicolor c-41, home developing, film developing
Comment

Nishika N8000 Quadra Lens 3D Camera - 52 Cameras, 52 Weeks

February 3, 2016
cannon_animation.gif
fence_animation.gif
north_carolina_animation.gif
distelfink_animation.gif
plum_run_animated.gif
sharpshooter_animated.gif
brenda_animated.gif
rifleman.jpg brenda_air_tires.jpg corbins_bbq.jpg general_samuel_wiley_crawford.jpg gettysburg_landscape.jpg bloody_run_gettysburg.jpg devils_den_landscape_tree.jpg devils_den_rockscape.jpg devils_den_tree.jpg field_fence.jpg pennsylvania_monument.jpg cannon.jpg north_carolina.jpg sachs_bridge.jpg distelfink.jpg

For this week's camera, I got out an old favorite of mine - the Nishika N8000 Quadra Lens 3D Camera. I had purchased it a few years ago from Amazon because it was such an unusual looking camera, and produced lenticular photos. Lenticular photos have the illusion of depth and appear to change or move when you tilt them back and forth.  I had hoped that it would still be possible to get lenticular prints made when I ordered the camera, but the lab that processed them was no longer in business, and there wasn't another one available at the time. A recent google search indicates that there is a lab that prints these types of photos, so that may be something worth checking into for future reference. 

Even though I wasn't able to get lenticular prints, I still liked the way the camera produced four almost identical photos from two frames, resulting in a total of 12 four frame photos for a roll of 24 exposures, or 17-18 four frame photos from a 36 exposure roll. Each photo is slightly different in that each one is shot at a slightly different angle through each of the four lenses. It's like the way that each of your eyes sees a slightly different angle if you close one or the other. This concept is also used when creating stereo cards that can be viewed with a stereoviewer to see a three-dimensional effect. There is a free software program available for Windows PCs that can create antique looking stereocards called StereoPhoto Maker. I have used this software previously with negatives from a Kodak Stereo Camera and other rolls of film I've shot with the Nishika N8000. I would create the stereocard and then upload it to Walmart Photo to have the stereocards printed, they worked great in my antique Holmes style stereoviewer.

Brenda and I decided to take a ride over to Gettysburg Battlefield to shoot the photos for this week. I thought some of the monuments would make good animated gifs and and the landscape would make interesting stereo cards. I also wanted to ride by the old Distelfink Restaurant outside Gettysburg, on old Route 15, to snap another photo of the aging sign, it has a very Pennsylvania Dutch design. The restaurant has been closed for a long while, a history of it can be found with an internet search.

For this week's roll of film, I used a 2002 expired roll of Kodak Portra 160NC film developed at home with a Unicolor C-41 kit purchased from the Film Photography Project store. The negatives were scanned with Epson V500 Photo flatbed scanner and some were converted to animated gif files in Photoshop.

In 52 Cameras 2016 Project, Film Photography Tags Gettysburg Battlefield, Gettysburg, Quadra Lens, Nishika N8000, 3D Camera, unicolor c-41, home processing, home developing, film developing, Film Photography Project, film photography, landscape, civil war, Stereo Camera, stereview, animated gifs
Comment

HolgaGlo 120N with Expired Kodak Portra 160NC - 52 Cameras

January 21, 2016
anatomy_models.jpg
brenda_camera_1.jpg
brenda_shooting.jpg
caboose.jpg
conowingo_dam_2.jpg
conowingo_dam.jpg
dali_on_pillow.jpg
my_drawing_table.jpg
orchard_tree.jpg
power_lines_at_conowingo.jpg
tree_at_conowingo.jpg
windowsill.jpg
anatomy_models.jpg brenda_camera_1.jpg brenda_shooting.jpg caboose.jpg conowingo_dam_2.jpg conowingo_dam.jpg dali_on_pillow.jpg my_drawing_table.jpg orchard_tree.jpg power_lines_at_conowingo.jpg tree_at_conowingo.jpg windowsill.jpg

For week 3 of 52 Cameras, 52 Weeks, we have the HolgaGlo 120N with expired Kodak Portra 160NC. I had recently been given the expired Kodak Portra 160NC by a close friend after he found it an old darkroom, he thought I might want to try it out to see what I would get with it. I have used the HolgaGlo 120N in my collection before, but only once to shoot a roll of Shanghai GP3 100 black and white film to try it out after I first bought it. I wanted to use color film in the camera, which I developed with a new Unicolor C-41 home developing kit that I bought from the Film Photography Project Store. This is my third kit, I've had good results from the previous kits, but my last one was greatly expired, time for a new kit.

For this week's roll of film, we took a trip down to the Conowingo Dam on the Susquehanna River on the border of Cecil and Harford Counties, Maryland. The Conowingo Dam is known for it's winter Bald Eagle population, as the birds come here to feed off the abundance of fish that are released through the turbines of the dam at times, which according to the visitor center hostess, the eagles anticipate when the warning lights start to flash. I wasn't really thinking that I would capture a Bald Eagle photo on my Holga camera, I just thought it would be fun to take a few shots of the dam and maybe a few things along the drive there and back. The weather was perfect, sunny and not too cold. We packed a picnic lunch, our cameras and binoculars, and had an enjoyable couple of hours watching the birds and talking to fellow photographers while we were there. A nice couple told us about the visitor center, so we stopped in and had a very informative conversation with the visitor center hostess about the construction and history of the dam and surrounding areas, as well as information about the Bald Eagle population.

Back to the Holga - In addition to the Conowingo photos, I also tried a few photos with a flash. I enjoy shooting with it, I just need to remember to set the focus before I take a shot. The film came out pretty nice, some color shifting and blue vignetting, but overall I like the color in these. I had shot another roll of this film with the HolgaGlo at Gettysburg, but that's not in this week's post, you'll have to check out my Flickr page to see those shots.

In 52 Cameras 2016 Project, Film Photography Tags Conowingo Dam, Bald Eagle, Holga, HolgaGlo 120n, home processing, home developing, unicolor c-41, Film Photography Project, film photography, 52 cameras
Comment
Older Posts →

Latest Posts

Featured
Dec 1, 2023
First sketch in a while
Dec 1, 2023
Dec 1, 2023
Nov 24, 2023
My first juried art show piece
Nov 24, 2023
Nov 24, 2023
Oct 26, 2023
Haunted Childhood Memories
Oct 26, 2023
Oct 26, 2023
Apr 30, 2023
New Design In My Artist Shop - CATSTRONAUT
Apr 30, 2023
Apr 30, 2023
Apr 11, 2023
Smoove Catz abc’S of coffee - Moka Pot
Apr 11, 2023
Apr 11, 2023
Apr 8, 2023
New Design in My Artist Shop - Photo Skully T-Shirts
Apr 8, 2023
Apr 8, 2023
Nov 13, 2022
Daily Sketch #18
Nov 13, 2022
Nov 13, 2022
Nov 13, 2022
Daily Sketch #17
Nov 13, 2022
Nov 13, 2022
Nov 13, 2022
Daily Sketch #16
Nov 13, 2022
Nov 13, 2022
Nov 5, 2022
Daily Sketch #15
Nov 5, 2022
Nov 5, 2022